
No-Bake Funfetti Oreo Icebox Cake
No-Bake Funfetti Oreo Icebox Cake
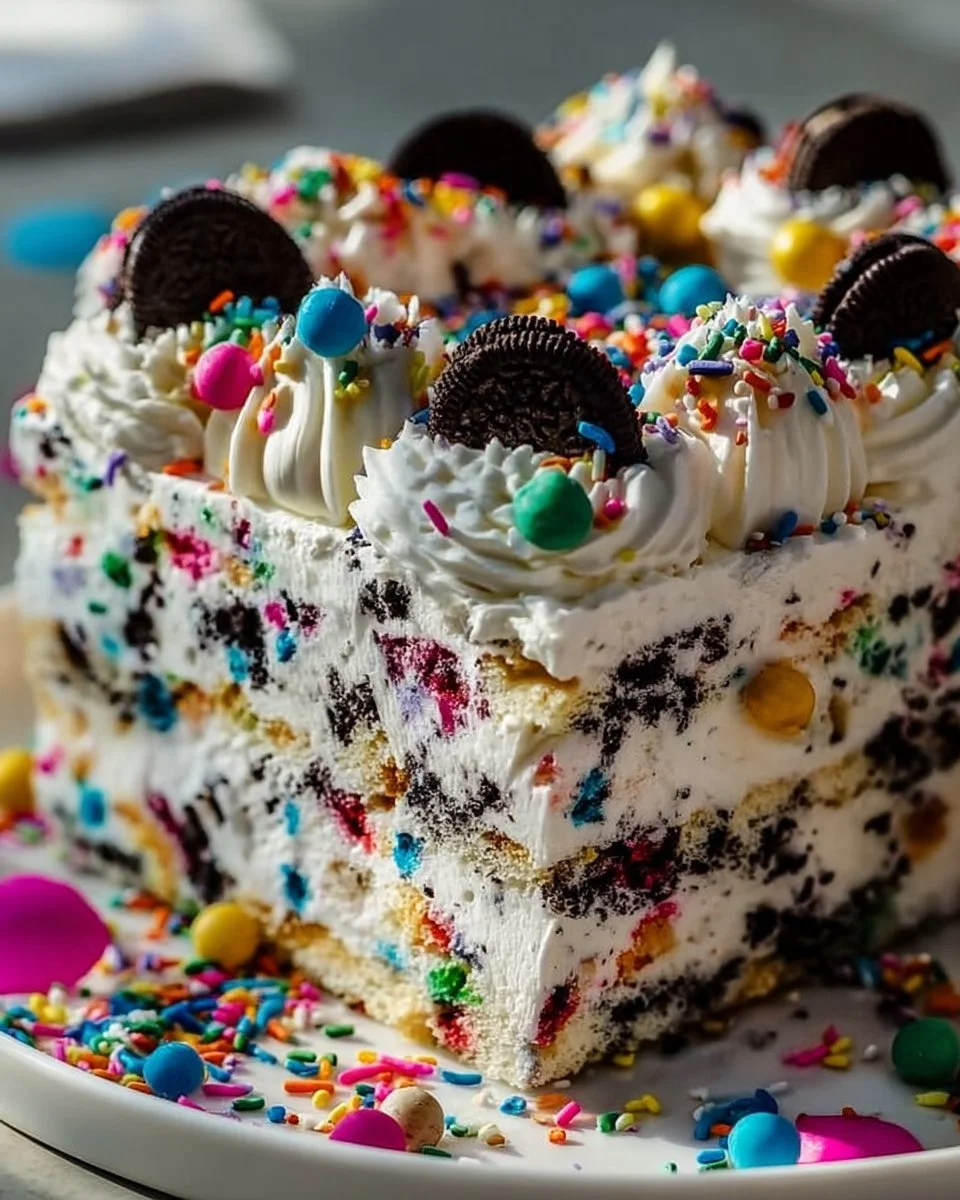
The No-Bake Funfetti Oreo Icebox Cake is a delightful dessert that combines the fun of birthday cake flavors with the crunch of Oreos. It’s an easy and fun treat to whip up, perfect for parties, gatherings, or just a sweet snack at home. With minimal effort and no baking required, this cake is sure to become a family favorite!
Why Make This Recipe
This recipe is amazing because it combines the beloved tastes of Oreos and colorful birthday cake. The no-bake aspect makes it easy and quick to prepare, even for beginners. Plus, it’s a fun way to bring a festive vibe to any occasion. Everyone loves a cake that looks as good as it tastes, and this one does just that with its vibrant sprinkles and creamy layers.
How to Make No-Bake Funfetti Oreo Icebox Cake
Ingredients:
- 2 packages Birthday Cake Oreos (or regular/Double Stuf)
- 2/3 cup milk
- 1 cup whipped cream or whipped topping
- 1/2 cup cream cheese, softened
- 1/4 cup powdered sugar
- 1/4 cup colorful sprinkles
Directions:
- In a mixing bowl, combine the softened cream cheese and powdered sugar. Beat until smooth.
- Gently fold in the whipped cream and sprinkles until well combined.
- Dip the Oreos in milk briefly and layer them in a rectangular baking dish.
- Spread a layer of the cream mixture over the Oreos.
- Repeat the layers until all ingredients are used, finishing with the cream mixture on top.
- Top with additional sprinkles if desired.
- Refrigerate for at least 4 hours or overnight for best results.
- Slice and serve chilled.
How to Serve No-Bake Funfetti Oreo Icebox Cake
Serve slices of this cake chilled from the refrigerator. You can add extra sprinkles on top for a festive touch or even a dollop of whipped cream for additional creaminess. It’s perfect for birthdays, holidays, or just as a fun dessert for any day!
How to Store No-Bake Funfetti Oreo Icebox Cake
Store any leftover cake in the refrigerator, covered with plastic wrap or in an airtight container. It will keep well for up to 3 days, although it’s best enjoyed fresh.
Tips to Make No-Bake Funfetti Oreo Icebox Cake
- Make sure your cream cheese is softened to room temperature for easy mixing.
- Use a whisk or electric mixer to blend the cream cheese and powdered sugar smoothly.
- Feel free to swap Birthday Cake Oreos with regular or Double Stuf Oreos for a classic twist.
- Let the cake chill overnight for a firmer texture and enhanced flavors.
Variation
Try adding different flavored Oreos or sprinkles to customize this dessert. You can also layer in some fruit, like sliced strawberries or bananas, for a fresh twist.
FAQs
Q: Can I use different flavors of Oreos?
A: Yes! You can use any flavor of Oreos you like for a unique taste.
Q: How long does this cake need to chill?
A: For the best results, chill the cake for at least 4 hours, but overnight is even better.
Q: Can I make this cake ahead of time?
A: Absolutely! Making it a day in advance is perfect, as it allows the flavors to meld together.

No-Bake Funfetti Oreo Icebox Cake
- Total Time: 255 minutes
- Yield: 8 servings
- Diet: Vegetarian
Description
A delightful no-bake dessert combining birthday cake flavors with crunchy Oreos, perfect for any celebration!
Ingredients
- 2 packages Birthday Cake Oreos (or regular/Double Stuf)
- 2/3 cup milk
- 1 cup whipped cream or whipped topping
- 1/2 cup cream cheese, softened
- 1/4 cup powdered sugar
- 1/4 cup colorful sprinkles
Instructions
- In a mixing bowl, combine the softened cream cheese and powdered sugar. Beat until smooth.
- Gently fold in the whipped cream and sprinkles until well combined.
- Dip the Oreos in milk briefly and layer them in a rectangular baking dish.
- Spread a layer of the cream mixture over the Oreos.
- Repeat the layers until all ingredients are used, finishing with the cream mixture on top.
- Top with additional sprinkles if desired.
- Refrigerate for at least 240 minutes or overnight for best results.
- Slice and serve chilled.
Notes
Store any leftovers in the refrigerator for up to 3 days.
- Prep Time: 15 minutes
- Cook Time: 0 minutes
- Category: Dessert
- Method: No-Bake
- Cuisine: American