Ice Cream Cone Cake Pops
Ice Cream Cone Cake Pops
Introduction
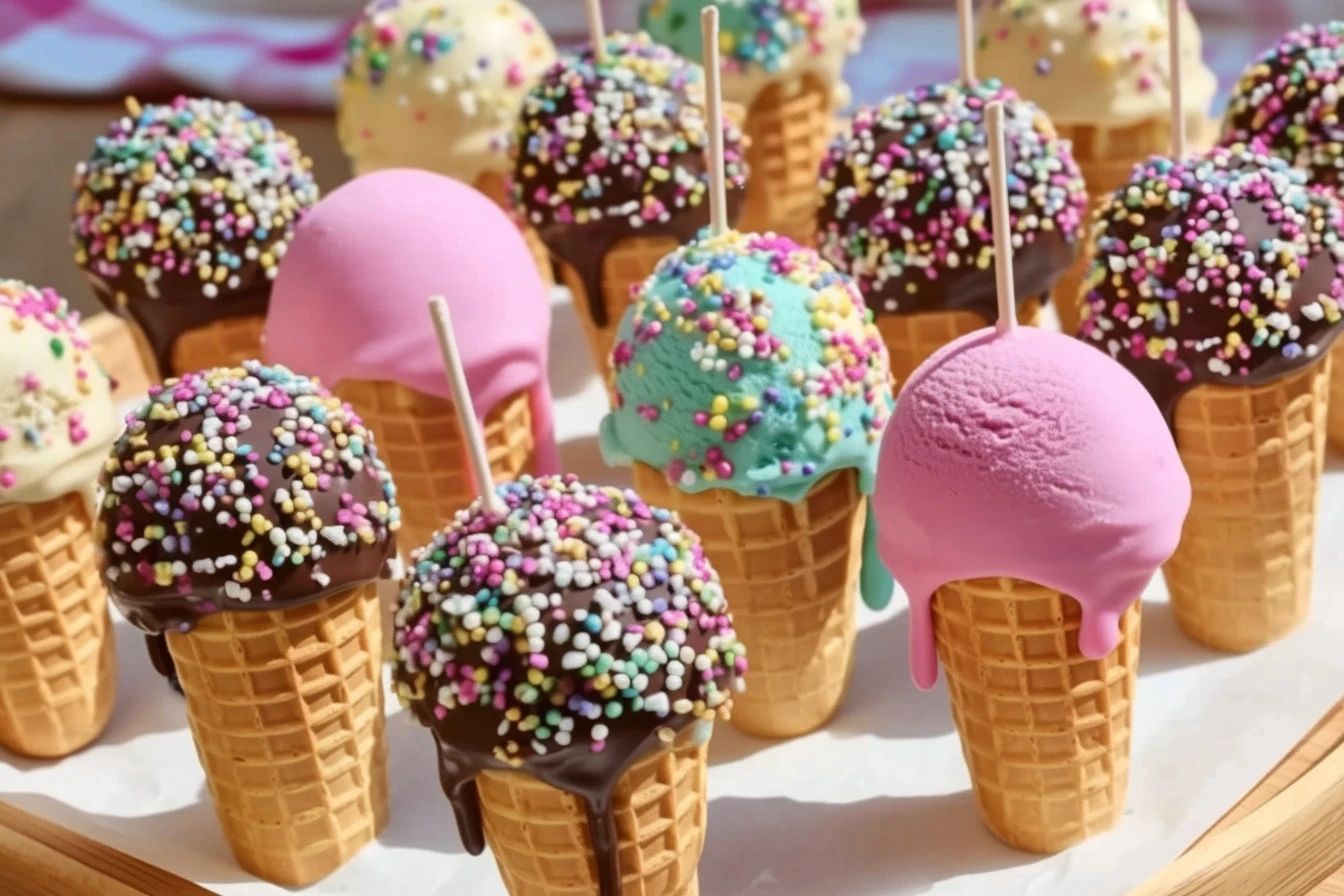
Ice Cream Cone Cake Pops are the perfect treat for any celebration! They combine the fun of cake pops with the whimsy of ice cream cones. Kids and adults alike will enjoy these bite-sized goodies that look adorable and taste delicious. Plus, they are easy to make, allowing you to get creative with colors and decorations.
Why Make This Recipe
There are many reasons to make Ice Cream Cone Cake Pops. First, they are a fun dessert that adds a touch of excitement to any party or gathering. Second, you can customize them to match any theme by choosing different cake flavors and decorations. Finally, these cake pops are great for sharing, making them a hit at birthdays, holidays, or just a fun afternoon treat.
How to Make Ice Cream Cone Cake Pops
Ingredients:
- 1 prepared cake (any flavor: chocolate, vanilla, funfetti, etc.)
- 1/3 to 1/2 cup frosting (buttercream, cream cheese, or canned frosting)
- 20 mini flat-bottomed ice cream cones
- 1 1/2 cups white or milk chocolate melts or candy melts/chips
- Gel food coloring (optional: pink, mint green, blue, etc.)
- Sprinkles, crushed nuts, or mini candies for decorating
- Wax paper or a foam block for drying pops upright
Directions:
- Bake and cool your cake. Use a boxed cake mix or your favorite homemade recipe, and let it cool completely.
- Crumble the cake into fine crumbs in a large mixing bowl.
- Add 1/3 cup frosting and mix thoroughly. Add more frosting, one tablespoon at a time, until the mixture holds together like cookie dough.
- Scoop tablespoon-sized portions, roll into balls, and place them on a wax paper-lined tray. Refrigerate for 1 hour or freeze for 15-20 minutes until firm.
- Attach the cake balls to mini cones by pressing them gently into the cone, optionally dipping the base in melted chocolate first.
- Melt the chocolate coating in a microwave-safe bowl in 30-second intervals until smooth. Add gel food coloring if using.
- Dip the top of each cake ball into the melted chocolate and decorate with sprinkles or mini candies.
- Let set at room temperature or refrigerate until hardened.
How to Serve Ice Cream Cone Cake Pops
Serve Ice Cream Cone Cake Pops at room temperature. They look best when arranged in a fun display, such as standing upright in a foam block or on a plate. You can also place them in a cute basket for a nice presentation.
How to Store Ice Cream Cone Cake Pops
Store your Ice Cream Cone Cake Pops in an airtight container. They will stay fresh for up to a week in the refrigerator. If you want to keep them longer, you can freeze them for up to three months. Just make sure they are completely set before freezing.
Tips to Make Ice Cream Cone Cake Pops
- Make sure your cake is completely cool to avoid melting the frosting.
- Don’t skip the chill time for the cake balls; it helps them hold their shape.
- Use different gel food colors to create colorful layers for your cake pops.
- Try different toppings like nuts, mini chocolates, or decorative drizzles.
Variation
You can try different flavor combinations, like chocolate cake with vanilla frosting or lemon cake with cream cheese frosting. Additionally, experiment with different colored candy melts to match your event theme.
FAQs
Q: Can I use store-bought cake?
A: Yes, using a store-bought cake or a boxed mix can save time and still produce delicious results!
Q: How do I stop the cake pops from falling off the cones?
A: To secure the cake pops better, dip the bottom of the cake ball in melted chocolate before pressing it into the cone. This acts like glue!
Q: Can I use regular ice cream cones instead of mini cones?
A: Yes, but keep in mind that regular cones will require larger cake balls and may be harder to handle. Mini cones work best for bite-sized treats!

Ice Cream Cone Cake Pops
- Total Time: 60 minutes
- Yield: 20 servings
- Diet: Vegetarian
Description
Delicious and fun Ice Cream Cone Cake Pops for any celebration, combining bite-sized cake pops with whimsical ice cream cones.
Ingredients
- 1 prepared cake (any flavor: chocolate, vanilla, funfetti, etc.)
- 1/3 to 1/2 cup frosting (buttercream, cream cheese, or canned frosting)
- 20 mini flat-bottomed ice cream cones
- 1 1/2 cups white or milk chocolate melts or candy melts/chips
- Gel food coloring (optional: pink, mint green, blue, etc.)
- Sprinkles, crushed nuts, or mini candies for decorating
- Wax paper or a foam block for drying pops upright
Instructions
- Bake and cool your cake completely.
- Crumble the cake into fine crumbs in a large mixing bowl.
- Add 1/3 cup frosting and mix thoroughly, adding more frosting as needed until the mixture holds together like cookie dough.
- Scoop tablespoon-sized portions, roll into balls, and place them on a wax paper-lined tray. Refrigerate for 1 hour or freeze for 15-20 minutes until firm.
- Attach the cake balls to mini cones by pressing them gently into the cone, optionally dipping the base in melted chocolate first.
- Melt the chocolate coating in a microwave-safe bowl in 30-second intervals until smooth. Add gel food coloring if using.
- Dip the top of each cake ball into the melted chocolate and decorate with sprinkles or mini candies.
- Let set at room temperature or refrigerate until hardened.
Notes
Store your cake pops in an airtight container, fresh for up to a week in the refrigerator or freeze for up to three months.
- Prep Time: 30 minutes
- Cook Time: 30 minutes
- Category: Dessert
- Method: Chilling
- Cuisine: American