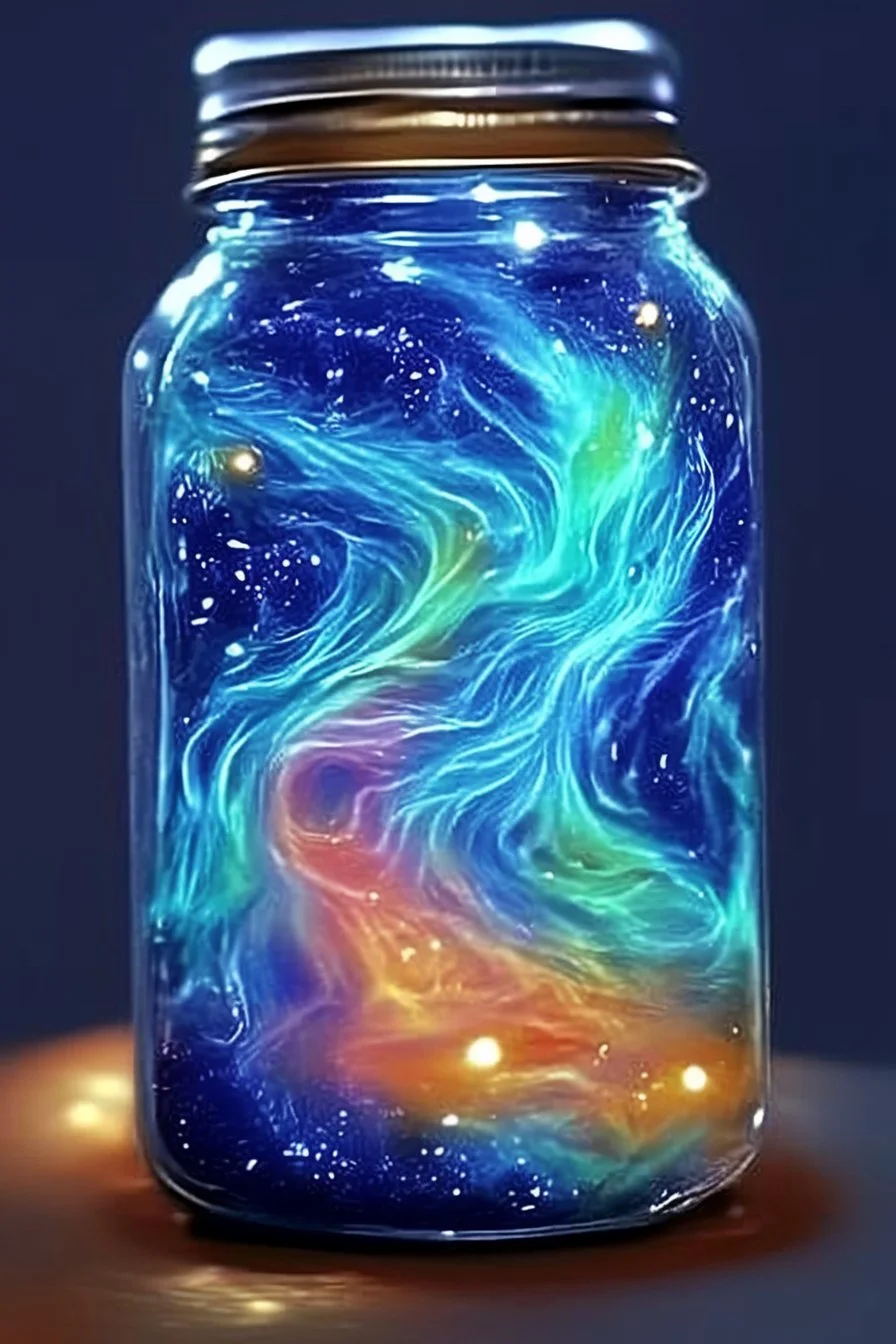
Glowing Aurora Borealis Jar DIY
Introduction
Creating a Glowing Aurora Borealis Jar is a fun and simple craft project that brings the magic of the Northern Lights right into your home. This DIY activity is perfect for kids and adults alike, allowing you to unleash your creativity while adding a beautiful glowing piece to your décor. With easy-to-find materials and straightforward steps, anyone can make this enchanting jar!
Why Make This Recipe
Making a Glowing Aurora Borealis Jar is a great way to brighten up your space with a touch of creativity. It serves as a soothing nightlight, a unique decorative piece, or a charming gift for friends and family. Plus, working with glow-in-the-dark paint adds an element of fun and wonder. You’ll enjoy the process of creating something beautiful while exploring colors and textures.
Table of Contents
How to Make Glowing Aurora Borealis Jar
Ingredients:
- 1 clear glass or plastic jar with lid (mason jars work great)
- Glow-in-the-dark paint (in aurora colors: green, blue, purple, pink)
- Small paintbrushes or sponge brushes
- Black acrylic paint (optional, for outer coat)
- Cotton balls (for a cloud effect, optional)
- Glitter (optional for extra sparkle)
- LED tea light or fairy lights (battery-operated)
- Water and a paper plate for easy cleanup
Directions:
- Wash and dry the jar thoroughly to remove any labels or residue.
- Using glow-in-the-dark paints, gently dab or brush streaks of color on the inside of the jar to mimic the Northern Lights.
- For a cloudy effect, gently pull apart cotton balls and stick them inside the jar between the painted areas. Sprinkle glitter on the inside while the paint is wet, if desired.
- Allow the jar to dry completely.
- Place an LED tea light or a small strand of battery-operated fairy lights inside the jar. If desired, paint the outside of the lid black.
- Charge the jar in direct sunlight or under a bright lamp to activate the glow paint. Then turn off the lights to enjoy the glow.
How to Serve Glowing Aurora Borealis Jar
Your Glowing Aurora Borealis Jar can be displayed on a shelf, a nightstand, or any space that needs a bit of light and charm. It looks beautiful during the day and becomes magical at night when it glows!
How to Store Glowing Aurora Borealis Jar
When not in use, store your jar in a cool, dry place away from direct sunlight to protect the glow-in-the-dark paint. If you want to keep it glowing, remember to recharge it under light occasionally.
Tips to Make Glowing Aurora Borealis Jar
- Make sure to use a thick layer of glow-in-the-dark paint to achieve the best glow effect.
- Experiment with different color combinations to create your own unique aurora design.
- If you’re using glitter, keep it minimal to avoid overpowering the beauty of the paint.
Variation
You can customize your jar by adding other elements, such as small figurines or crystals, to enhance the overall look. You can also try using different colors of glow paint or add layers of color for a more complex design.
FAQs
Q1: Can I use regular paint instead of glow-in-the-dark paint?
A1: Regular paint won’t glow. Make sure to use specifically glow-in-the-dark paint for the best effect.
Q2: How long does the glow last?
A2: The glow effect usually lasts for a few hours after charging it in light. You can recharge it as needed.
Q3: Are there any safety precautions I should take?
A3: If using glass jars, be careful while handling them to avoid cuts. Also, ensure that battery-operated lights are used to prevent heat.
Glowing Aurora Borealis Jar DIY
- Total Time: 1 hour (including drying time)
- Yield: 1 glowing jar
Description
Create your own magical Northern Lights with this glowing Aurora Borealis Jar! Perfect for decorating bedrooms, parties, or for a fun family craft night. This glowing jar captures the beauty of the auroras and adds an enchanting glow to any space.
Ingredients
– 🥫 1 clear glass or plastic jar with lid (mason jars work great)n- 🎨 Glow-in-the-dark paint (in aurora colors: green, blue, purple, pink)n- 🖌️ Small paintbrushes or sponge brushesn- 🖤 Black acrylic paint (optional, for outer coat)n- ☁️ Cotton balls (optional, for a cloud effect)n- ✨ Glitter (optional for extra sparkle)n- 💡 LED tea light or fairy lights (battery-operated)n- 💧 Water and a paper plate for easy cleanup
Instructions
1. Clean your jar thoroughly and dry it completely.n2. Use glow-in-the-dark paint to create streaks of aurora colors on the inside of the jar.n3. Add pulled-apart cotton balls between the painted areas for a cloudy sky effect.n4. Sprinkle glitter while paint is still wet for extra sparkle.n5. Let the jar dry completely.n6. Place an LED tea light or fairy lights inside the jar.n7. Optionally, paint the outside of the jar lid with black acrylic for a finished look.n8. Charge the jar under direct sunlight or a lamp to activate the glow.n9. Turn off the lights and enjoy your glowing aurora masterpiece!
Notes
– Try different patterns or dot effects with the glow paint.n- Great for kids’ night lights or themed party decor.n- Glow effect improves with stronger light charging before use.
- Prep Time: 10 minutes
- Cook Time: 0 minutes
- Category: Crafts
- Method: DIY
- Cuisine: N/A