Description
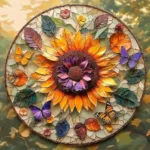
Flower pressing art is a fun and creative way to preserve the beauty of fresh flowers. This simple DIY craft lets you turn flowers into lasting pieces of art, perfect for decoration or gifting.
Ingredients
– Fresh flowers – Wax paper – Crayon shavings – Iron – A frame of your choice
Instructions
1. **Press the Flowers**: Place fresh flowers between absorbent paper (like paper towels) and weigh them down with heavy books. Let sit for 2–3 weeks to fully dry and flatten. 2. **Prepare the Wax Paper**: Cut two sheets of wax paper to match your chosen frame size. Ensure they are clean and even. 3. **Arrange the Flowers and Crayon Shavings**: Lay one sheet of wax paper flat, arrange dried flowers on top, then sprinkle with crayon shavings for added texture and color. 4. **Seal and Iron the Wax Paper**: Place the second sheet of wax paper on top. Using a medium heat iron (no steam), press gently for a few seconds to melt and seal the sheets together. 5. **Cool and Frame**: Let the artwork cool completely. Place it into the frame and secure it for display.
Notes
Tips: – Use flat flowers with vibrant colors like daisies, pansies, or violets. – Try different crayon colors to create unique backgrounds. – Avoid using too much heat while ironing to prevent burning the flowers. Variations: – Create themed collections based on seasons or color schemes. – Add pressed leaves, twigs, or herbs for more texture. FAQs: – **Can I use dried flowers instead of fresh ones?** Yes, but fresh flowers retain brighter colors. – **How long does the pressed flower art last?** If stored properly, for years. Colors may fade with light exposure. – **Can I use other materials instead of crayon shavings?** Yes! Try glitter, colored sand, or small pebbles.
- Prep Time: 10 minutes (excluding pressing time)
- Cook Time: 5 minutes
- Category: Craft
- Method: Pressed & Ironed
- Cuisine: N/A