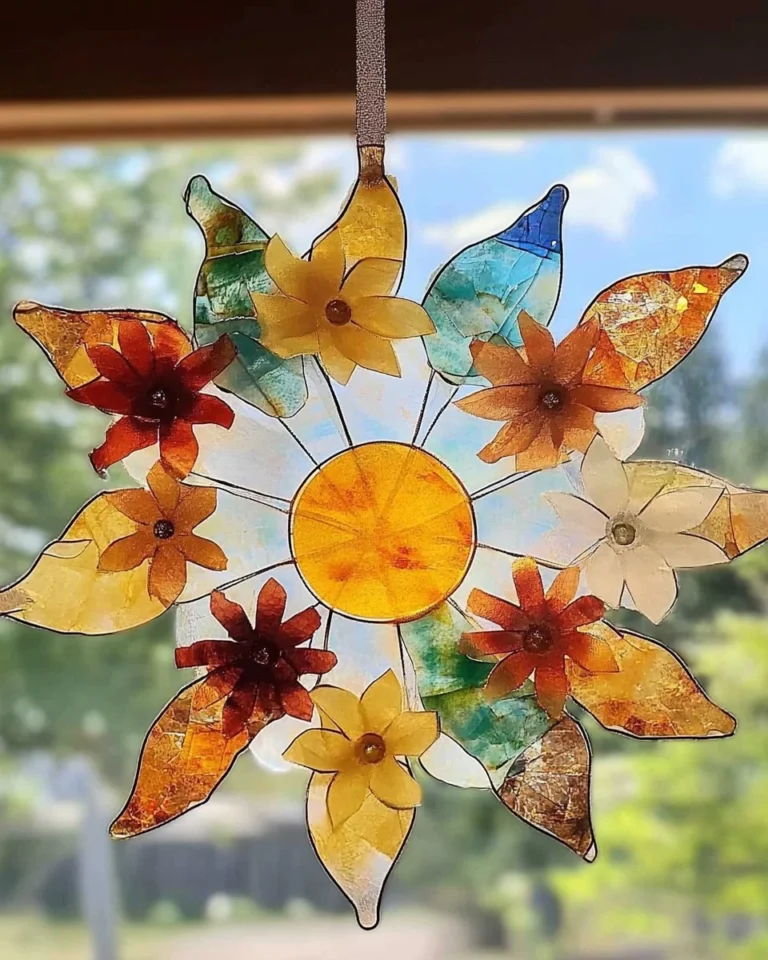
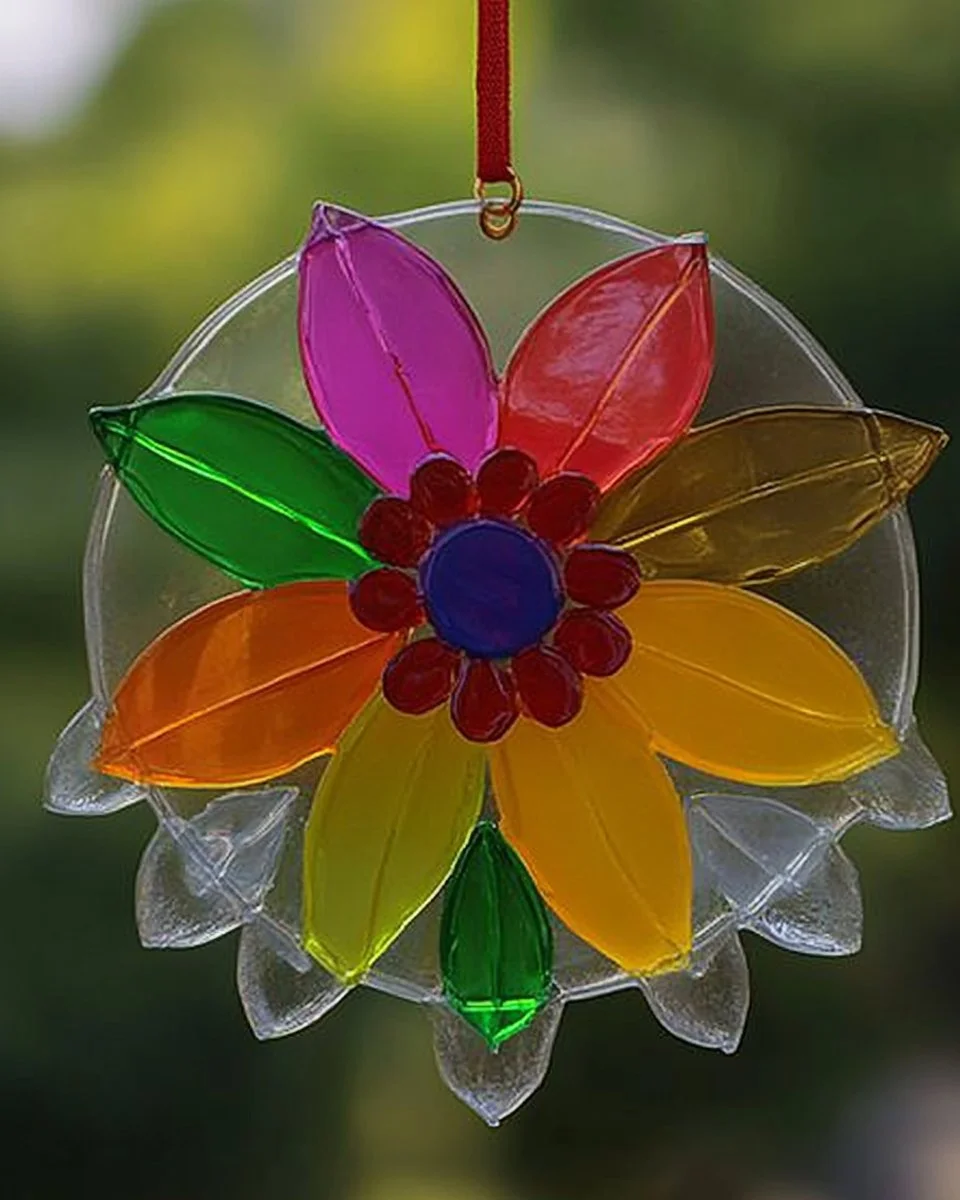
Colorful Glue Suncatcher
the Colorful Glue Suncatcher is a wonderful DIY project that adds a splash of color to your home. Perfect for sunny days, these suncatchers catch the light and create beautiful patterns on your windows. They are easy to make and a fun craft for kids and adults alike!
Why Make This Recipe
Making a Colorful Glue Suncatcher is a great way to spark your creativity. It’s a simple and enjoyable craft that can brighten up any room. Plus, it’s a wonderful activity to do with kids. Not only do you get to make something colorful, but you also get to spend quality time together. It’s a fantastic way to decorate your space while also developing artistic skills.
How to Make Colorful Glue Suncatcher
Ingredients:
- White craft glue or school glue
- Plastic lid (cottage cheese, sour cream, yogurt, etc.)
- Liquid food coloring
- Toothpick
- Embroidery floss
- Needle
- Pony beads
- 4-hole buttons
Directions:
- Start by placing your plastic lid upside down on the table.
- Fill it generously with white craft glue or school glue.
- Add three drops of liquid food coloring in three different spots within the glue to create a splash of color.
- Use a toothpick to gently swirl the food coloring around, mixing it in for a beautiful marbled effect.
- Set your masterpiece aside somewhere safe for about 5-6 days. It’s important it remains undisturbed during this time!
- After 4 days, carefully pull back some of the dried glue to check on your suncatcher. If it’s still wet, let it dry for a bit longer!
- Once it’s completely dry, carefully peel your colorful creation out of the lid.
- For the hanging strings, thread a needle with embroidery floss and poke it through the bottom of the suncatcher. Pull it through and take off the needle.
- Line up the ends of the thread and repeat this step two more times, creating three strings that are about 8 or 9 inches long.
- Thread about eight pony beads onto each string for some fun flair.
- Take two of the strings and thread them through a 4-hole button, knotting it securely three times. Trim any excess string.
- Grab another strand of embroidery floss and thread the needle. Poke it through the top of the suncatcher and knot it for the hanger.
- Get creative and add about seven pony beads onto the hanging string, then loop it back through the final bead and pull tight.
- Finally, hang your gorgeous suncatcher in a sunny spot and watch it come alive with color!
How to Serve Colorful Glue Suncatcher
The Colorful Glue Suncatcher is not a food item, but it can be enjoyed as a decorative piece. Hang it in a sunny window or in a garden where it can catch the light and make colorful patterns. It’s a beautiful way to bring joy and brightness to your living space.
How to Store Colorful Glue Suncatcher
To store your Colorful Glue Suncatcher, handle it with care to avoid breakage. If you need to store it, keep it in a safe spot, away from direct sunlight and moisture. Avoid stacking heavy objects on top of it. It’s best enjoyed when hung in a window.
Tips to Make Colorful Glue Suncatcher
- Experiment with different colors of food coloring to create unique designs.
- Try using different shaped lids or even cookie cutters placed underneath the glue for fun shapes.
- For added extra flair, use glitter mixed into the glue.
Variation
Instead of using just food coloring, you can blend in small pieces of colored tissue paper for a different effect. This will give your suncatcher a multi-textured and layered look.
FAQs
1. Can I use other types of glue?
Yes, you can use other types of glue, but white craft glue or school glue works best for this project since it dries clear and flexible.
2. How long does it take for the suncatcher to dry?
It generally takes about 5-6 days for the suncatcher to dry completely. Make sure not to disturb it during this time.
3. Can I make a suncatcher with my child?
Absolutely! This is a perfect craft for children to help with. Just supervise them while they handle the glue and needles.
Colorful Glue Suncatcher
- Total Time: 6 days (drying time)
- Yield: 1 suncatcher
Description
The Colorful Glue Suncatcher is a fun and vibrant DIY craft that adds cheerful color to any window. Perfect for kids and adults!
Ingredients
– 🧴 White craft glue or school gluen
– 🥄 Plastic lid (from cottage cheese, sour cream, yogurt, etc.)n
– 🌈 Liquid food coloringn
– 🪥 Toothpickn
– 🧵 Embroidery flossn
– 🪡 Needlen
– 🔵 Pony beadsn
– 🔘 4-hole buttons
Instructions
1. Place the plastic lid upside down on a flat surface.n2. Fill the lid generously with white craft glue.n3. Add three drops of different food coloring spots inside the glue.n4. Use a toothpick to gently swirl the colors, creating a marbled effect.n5. Leave the lid undisturbed in a safe spot to dry for 5–6 days.n6. After 4 days, check if the glue has dried by gently pulling a small section.n7. Once fully dry, peel your suncatcher from the lid.n8. Thread embroidery floss through a needle, poke it through the bottom of the suncatcher, and remove the needle.n9. Repeat to create three hanging strings about 8–9 inches long.n10. Thread about 8 pony beads on each string for decoration.n11. Use two strings and thread them through a 4-hole button, then knot securely three times.n12. Thread another piece of floss through the top of the suncatcher to create a hanger.n13. Add about 7 beads on the hanging floss, loop back through the final bead, and pull tight.n14. Hang your beautiful suncatcher in a sunny window and enjoy the light show!
Notes
– Try different lid shapes or cookie cutters for unique designs.n- Add glitter or small bits of tissue paper to the glue for extra flair.n- Make sure the suncatcher dries undisturbed to prevent cracking.
- Prep Time: 10 minutes
- Cook Time: 0 minutes
- Category: Crafts
- Method: DIY
- Cuisine: N/A