Blue Crayon Suncatchers
Blue Crayon Suncatchers
Introduction
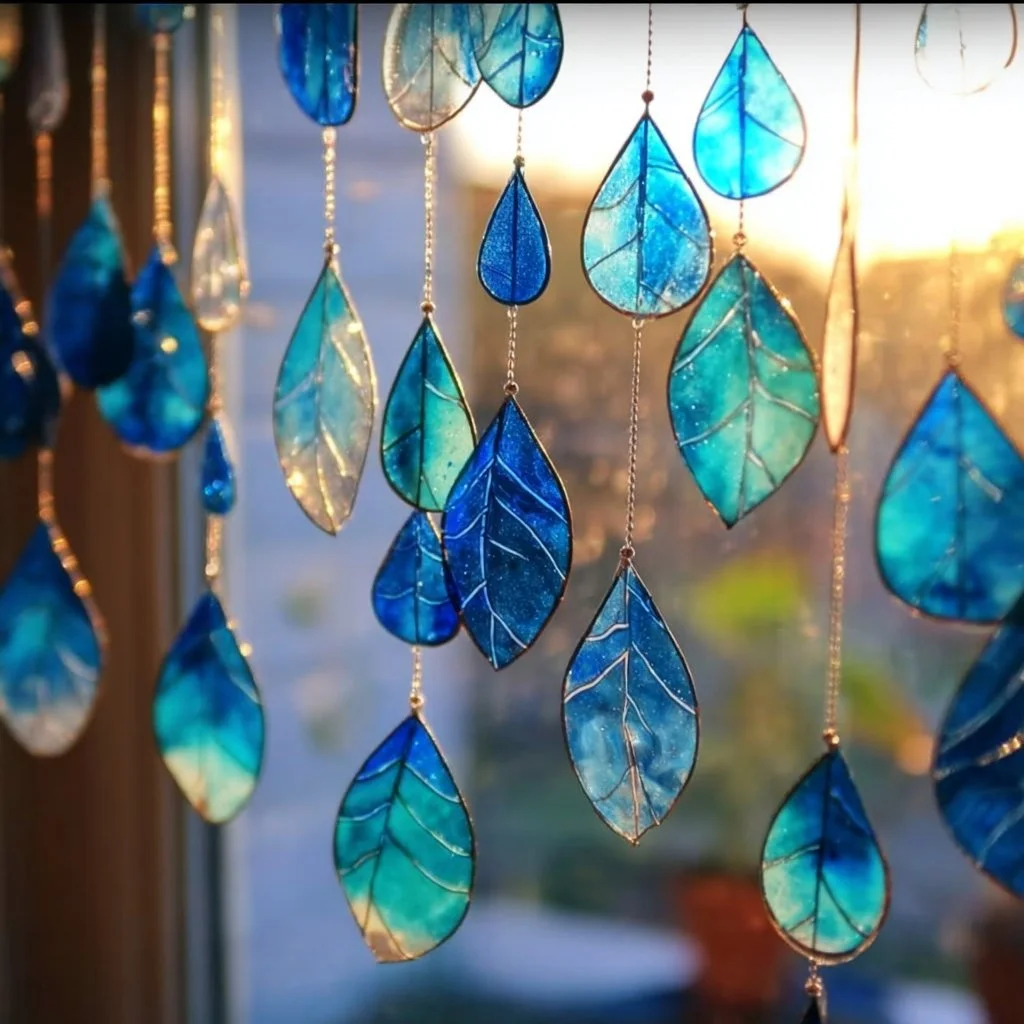
Creating beautiful art can be simple and fun! One delightful craft is making Blue Crayon Suncatchers. This project is perfect for a rainy day or as a creative activity with friends or kids. With just a few materials, you can brighten up your home with colorful light.
Why Make This Recipe
Making Blue Crayon Suncatchers is a great way to use leftover crayons and create something beautiful at the same time. This activity encourages creativity and is a fun way to learn about how light interacts with colors. Plus, hanging these suncatchers in your windows can add a cheerful touch to your home.
How to Make Blue Crayon Suncatchers
Ingredients:
- Blue crayons (light, dark, turquoise)
- Pencil or crayon sharpener
- Wax paper
Directions:
- Sharpen the blue crayons using the sharpener.
- Shave the crayon shavings onto a piece of wax paper.
- Place another piece of wax paper on top and gently iron it to melt the crayon shavings, creating a colorful design.
- Let it cool and then cut it into shapes as desired.
- Hang your suncatcher in a window to enjoy the colorful light it casts.
How to Serve Blue Crayon Suncatchers
There is no serving involved! Just hang your beautiful Blue Crayon Suncatchers in a sunny window. Enjoy the way the sunlight shines through and creates colorful patterns on your walls and floor.
How to Store Blue Crayon Suncatchers
These suncatchers do not require storage in the traditional sense, as they are decorative pieces meant to be displayed. However, if you need to take them down, store them flat in a dry place. Avoid stacking them to prevent bending or damage.
Tips to Make Blue Crayon Suncatchers
- Use different shades of blue for a more vibrant design.
- Experiment with different shapes when cutting your suncatcher.
- Make several suncatchers to create a beautiful display.
Variation
Feel free to mix in yellow or white crayons for a unique twist. You can also layer different colors of crayon shavings for a more intricate design.
FAQs
1. Can I use other colors of crayons?
Yes! While this recipe focuses on blue crayons, you can use any colors you like.
2. Do I need an iron?
Yes, you will need an iron to melt the crayon shavings between the wax paper. Ask an adult for help if you’re unsure how to use it.
3. How long does it take to make a suncatcher?
The entire process usually takes about 30 minutes, including preparation and cool down time.
Now you are ready to create wonderful Blue Crayon Suncatchers! Enjoy your crafting!
Print
Blue Crayon Suncatchers
- Total Time: 30 minutes
- Yield: 1 suncatcher
- Diet: N/A
Description
Create beautiful Blue Crayon Suncatchers that brighten up your home with colorful light using leftover crayons.
Ingredients
- Blue crayons (light, dark, turquoise)
- Pencil or crayon sharpener
- Wax paper
Instructions
- Sharpen the blue crayons using the sharpener.
- Shave the crayon shavings onto a piece of wax paper.
- Place another piece of wax paper on top and gently iron it to melt the crayon shavings, creating a colorful design.
- Let it cool and then cut it into shapes as desired.
- Hang your suncatcher in a window to enjoy the colorful light it casts.
Notes
Use different shades of blue for a more vibrant design and experiment with different shapes. Make several suncatchers for a beautiful display.
- Prep Time: 10 minutes
- Cook Time: 20 minutes
- Category: Craft
- Method: DIY Crafting
- Cuisine: N/A